Hey All,
I'm migrating over to wordpress! You can follow my further adventures at www.engineerfood.com
Tuesday, November 22, 2011


Thursday, November 10, 2011
Italian American Gravy
This post is an exceptionally long one because it is a recipe I grew up with and is very dear to me. There was nothing better than the few times a year when I would wake up at eleven and come downstairs to see my dad standing over the stove stirring a gigantic stock pot full of tomato sauce with the smell of fresh meatballs filling the kitchen.

For those of you who have yet to be blessed by the wonders that unfold in your mouth when you eat gravy (some heathens call it sauce) and have no idea what awaits you, gravy is a typical red sauce with meatballs, sausage, large chunks of chuck steak and whatever cheap cuts of meat you can find. This is different from bolognaise in that bolognaise uses finely chopped or ground meats whereas gravy uses whole cuts, making it a full meal in one dish (a rarity in Italian cooking, which is heavily course-based).
When you buy meat for a gravy style sauce, don't be afraid to reach for the tougher but cheaper cuts. You will be cooking them for a long enough time that, by the end, they will be falling apart.
The secret to perfect gravy is time. I try to start cooking about eight to ten hours before I plan on eating. Yes that is a long time. Yes it is worth it. Yes you need to plan ahead.
What you will need:
- For the sauce:
- Several cans of different brands of diced and pureed tomatoes. You will need about two large cans for every three people you are planning on feeding. It is important to have multiple brands because each company treats their tomatoes slightly differently, so you will get a greater variety of flavor combinations.
- 1/2 a medium onion finely diced.
- One clove of garlic, sliced very thin. (People who have followed my recipes know that I generally try to vampire-proof my recipes, garlic wise. Don't worry, we'll get there)
- Salt, Pepper, Basil, Oregano and any other spices that suit your fancy
- For the meats:
- Equal parts ground veal, pork and beef. The Shoprite near me has a "meatloaf mix" where you can buy all three in one package
- One pound chuck steak
- Six to Eight Sweet Italian Sausages
- Any other meats that strike your fancy. I got some spare pork ribs, but they didn't fit in my pot. Try to plan so that about a third to a half of the total volume of your gravy is meat.
- A head of garlic (less one clove)
- Two eggs and about two cups of bread crumbs for every pound of ground meat
- The same spices as above
Order of Operations:
A note in advance, I am going to list the parts in the order that they need to be started. Please note that you will still need to keep half an eye on the other portions of the meal.
Now that I've scared you, let's begin!
First thing's first: start the sauce
- If you have an immersion blender, go ahead and plunge it into the cans of chopped tomato to puree it a bit. If you don't have one, get one because immersion blenders are awesome, but in the mean time blend it in a blender.
- Take the biggest sauce/stock pot you have. Yes, that one that belonged to your great-grandmother and has been sitting in the back of your cabinet for months after that one time you used it to make sangria. Put it on the stove and turn the heat on to high.
- Into the dry pot, drop the sliced garlic and the diced onion, and stir it around until you begin to get little caramelized marks at the bottom of the pot. Add in a bit of salt, a lot of pepper, some basil and a touch of oregano. When you can just smell the spices start to singe, add in all of your tomatoes and re-add each of the herbs and such you added before.
- Bring it to a boil and then lower the heat and let it simmer. Get started on the meatballs.
- Let it simmer for as many hours as you can. Stir it often to keep it from burning or sticking to the pot
Next: the meatballs
- Preheat the oven to 375F
- Get yourself a large mixing bowl and a foil pan
- Put your ground meats, your eggs and breadcrumbs and a pinch of salt, a bunch of pepper a lot of basil and some oregano. (As a side note, and in no way related to my last batch of mildly disappointing meatballs, dried basil and dried oregano look very similar. Check the labels.)
- Wash your hands
- Get your hands dirty in that bowl and mix everything together until you have one gross, homogeneous ball of meat
- Shape the meatballs by hand. I make about 2" balls, but you can make them smaller if you find that intimidatingly large. Place them directly in the tin pan. You don't have to keep them from touching, but also don't pack them super tight (I was able to get a dozen in a large pan).
- Wash your hands
Set and wait
- Put the rest of your meats in foil pans. If for some reason you actually like the environment more than your convenience, you can use cookie sheets or keep the pans and wash them.
- Take the head of garlic and remove cloves but leave them unpeeled. Scatter three to five pieces in each pan of meat and meatballs.
- Put all of that in the oven for about two hours, or until all of the meat is cooked.
- Take out the meat and put it in the tomato sauce (which has, by now, been simmering for about 2-1/2 hours)
- Let that simmer for at least another three hours if not longer
When you have stalled as long as you can, serve with a hearty pasta like rigatoni or large linguine with grated parm and a nice red.
Monday, November 7, 2011
Fried Hearts of Romaine and Broiled Brussels Sprouts

One Romain Heart per person (Half if this is part of a larger meal)
Olive Oil
Salt, Pepper, Garlic, Onion Powder and Red Pepper Flakes to taste.
Slice the hearts in half hotdog style, so that you have two pieces, each with the heart at the bottom intact. Combine the oil (enough to coat all of the romaine) and seasonings in a bowl and mix thoroughly and brush the mixture evenly over all sides of the romaine and place face down in a medium sauce pan over medium to medium high heat, turning regularly, until leaves have wilted. Serve with bread to soak up the extra oil.
 |
| I wasn't able to get a photo before my boyfriend decided he needed to try it... |
I was also able to try a recipe that a friend of mine gave me ages ago for broiled Brussels Sprouts. To all of you nay-sayers out there, here me out. Brussels sprouts can be delicious, you just need to cook them long enough that they stop tasting like sprouts.
To make Brussels Sprouts that don't taste awful:
Pre-heat the oven to 450F. Slice the sprouts in half so that the stem is split. Lay them one layer thick in a cooking sheet, flat side up and drizzle with olive oil and salt and pepper to taste. Put them in the oven for two hours or until they are tender and the hearts are easily pierced with a fork. Eat them hot and enjoy the crunchy goodness.

What is your favorite, slightly different way to cook a green thing? Leave me a comment!
Coming later this week: Itailan Style Gravy (Like Grandma Used to Make!)
Thursday, October 27, 2011
The Rest of Ramen Week:
Haha! I finally have time to write up the rest of my Ramen Week experiments.
For those of you who missed my last two posts, here are the rules for the week:

For those of you who missed my last two posts, here are the rules for the week:
- Every day for one week, I must have at least one ramen based meal.
- I refuse to use flavor packs
- The meal must be healthy
- It must cost under $5.00 per serving
For the latter four meals of the week, I made
- Ramen and Cheese
- Ramen Crusted Chicken
- Ramen Taco Salad
- Ramen with Beer Steamed Mussels
For the Ramen and Cheese:
Sadly, I was unable to get a picture of the beauty that was the gorgeous cheese sauce I made for my Ramen and cheese. Such is life.
This isn't a huge meal but it would be perfect for a quick and filling lunch.
For two servings, you will need:
- 1 cup Milk (lactaid for me): $0.30
- 1 cup Shredded Cheese (I used half mozzarella and half cheddar, but, if you want to splurge, feta is fantastic):$1.33
- 2 packages Ramen: $0.36
- 3 Scallions $0.08
Total price per serving: $1.04
Preheat the oven to 250F. In a medium sauce pan melt a pad of butter and mix in an equal part of flour to make a roux. Cook over medium heat until the flour is blonde colored. Add in milk and whisk until it begins to boil. Take off the heat and gradually melt in cheese while sitrring continuously. Once you have one homogeneous blob of creamy goodness, put on low heat and coarsely chop your scallions. Mix in along with any seasonings you fancy and then add in cooked ramen. Transfer to a oven proof container and place in the oven until the cheese begins to bubble (about ten minutes). Serve hot.
For the Ramen Crusted Chicken:
 |
| Doesn't that look fantastic! |
For two servings:
- 4 Chicken Tenders: $1.32
- 1 package Ramen: $0.18
- 1 egg: $0.18
Total price per serving: $0.84
Remove the ramen from its packaging and crush it into a powder (it won't be very fine, don't kill yourself) and mix into it garlic and onion powders and salt and pepper. Crack the egg into a bowl and beat a little to break up the yolk. Carefully and completely dry off the chicken. Take a pan and add some oil or butter and heat. Coat the chicken first in egg and then in your ramen mixture and put directly into the pan. Cook fully on medium heat until the chicken is cooked through and the ramen is golden brown on both sides.
 |
| The Chicken and Ramen and Cheese together on one plate |
For the Ramen Taco Salad:
 |
| Better than it looks |
This erm...delicacy is a variation of one of my favorite dishes.
For four servings you need:
- 1 pound of Ground Beef: $3.32
- 1 jar Medium Salsa: $1.79
- 1 can Black Beans $0.79
- 1/2 cup Shredded Cheese: $0.67
- 2 packages Ramen: $0.36
Price per serving: $1.73
In a medium sacuepan, cook the ground beef with any seasonings you prefer until it is cooked through. Add in drained black beans and salsa. Remove the ramen from its packaging and break it into nacho sized pieces. Add the ramen and coat with cheddar. Mix it all together and serve immediately, before the ramen has time to soften. Top with more cheese.
For the Ramen with Beer Steamed Mussles
I am always looking for recipes that incorporate beer because I have yet to find anything that will give the same hearty and rich flavor to a dish. So I decided to try one for the last day of Ramen Week.

For two servings you will need:
- 15 Mussles: $3.25
- 1 bottle of your Beer of Choice (I used Yuengling Black and Tan): $0.84
- 1 Onion, chopped coarsely: $0.80
- 2 packages Ramen: $0.36
Price per serving: $2.63
First off, clean the mussels by scrubbing with a lousy/old toothbrush under running water. Throw away any that open before or during cleaning. When they are all cleaned, loosely chop your onion (~1" pieces). Boil beer over medium heat (Note: boiling comes significantly after simmering. The boozahol needs to boil off some.) Add your onion into the pot and let sit, stirring occasionally until the onions have softened. Add mussels and uncooked ramen and cover until the mussels have all opened and the ramen is soft. Serve with the beer you cooked with. Because it is delicious, that's why.
So, that concludes my annual Ramen Week. If you have any comprehensive ideas for my next challenge (I'm looking at you mystikraven) leave me a comment below and I'll think about it.
Sunday, October 23, 2011
Ramen Week Days Two and Three: Beef Stir Fry and a Midnight Snack
Apparently, making commitments and time to cook every day will not prevent life from keeping you from blogging about it. So, you lucky people get two recipes in one post!
A quick reminder about the Rules of Ramen Week:
- Every day for one week, I must have at least one ramen based meal.
- I refuse to use flavor packs
- The meal must be healthy
- It must cost under $5.00 per serving
 |
| No real noodles were harmed in the making of these meals |
Price for four meals:
- Beef (I got it on sale and it was in my freezer): ~$3.00
- Six Baby Carrots (assuming 50 to a bag): $0.20
- Half bag of Snap Peas: $2.00
- One onion: $0.80
- One green pepper: $0.85
- Three packages Ramen: $0.54
Alright, this may not be the healthiest thing I have ever cooked, but it was cheap, delicious and filling.
If you have never made stir fry before this wikipedia article provides some useful guidance.
This does involve a good deal of prep work. Before you even pull out your pan, cut your beef into bite sized portions and breifly marinade in teryaki sauce (or worchester sauce with a drop of tobasco will work beautifuly if you have no teryaki) and dice your onion and pepper, slice your carrots and boil your Ramen. You will also want to prepare a end sauce. Mine consisted of a mix of teryaki and oyster sauces but any thick sauce will do.
Take out your wok (or, if you don't have one a frying pan will work just fine) and dress it with sesame oil. Add whichever spices you prefer in your stir fry (I use garlic and ginger with just a hint of ground mustard seed). When the pan is hot enough, throw in your beef and sear it.
 |
| Beautiful. Just beautiful. |
When the beef is cooked through, remove it to another plate and throw in your vegetables with a little more sesame oil. Cook them on high until the vegetables have softened.
 |
| So healthy, right? |
 |
| Maybe not... |
For day three, I made a evening snack out of Ramen noodles and two eggs.
For two snacks:
- One Ramen Pack: $0.18
- Two eggs: $0.33
Price per serving: $0.26
This is a really simple snack that is so easy to make.
Take your ramen before it is cooked and crush it into tiny pieces.
 |
| Apparently a bag of crushed ramen looks just like a while bag of ramen |
 |
| Protein! |
 |
| Eat immediately |
Up next: Ramen and Cheese
Thursday, October 20, 2011
Ramen Week Day One: Ramen with Spinach and Tomato Sauce
Whelp, it's that time of the semester again. Midterms have forced me into a temporary hiatus from blogging. So, now I'm back, sick of engineering optimization, heat transfer theory, differential equations and applied motion. Time for cooking!
Unfortunately, eating out and ordering in while I was studying for all of my tests has cut a pretty deep gouge into my budget. You know what that means. It's my semesterly Ramen Week!
 |
| Yay? |
- Every day for one week, I must have at least one ramen based meal.
- I refuse to use flavor packs
- The meal must be healthy
- It must cost under $5.00 per serving
Today I made Ramen with Spinach and Tomato Sauce
My price list, for two lunches:
- 1/2 Package of Spinach (The other half to be used for a salad for dinner): $1.25
- 4 Chicken Tenders (From a package of 22 purchased for $7.26): $0.70
- 1 Can of Chopped Tomatoes: $1.25
- 2 Packages of Ramen: $0.36
Total: $4.26 for two meals (One for me and one for boyfriend)
First thing's first. Put a pot on to boil for your ramen packets.
While you are waiting for that, steam your spinach by putting a large amount of it in a pan over medium heat and cover it tightly until the spinach is thoroughly wilted.
 |
| Actually yay. I love spinach. |
 |
| Easy? Yes. Delicious? Abso-freaking-lutely. |
 |
| Pretty colors, shitty presentation. |
Thursday, September 22, 2011
Peanut Sauce for reddit
I put out an offer on reddit last week to create a blog post based on any requests that redditors had to offer. The first response was from user nicksterluv:
Unfortunately, I had never before cooked anything even remotely Thai, so my next few days were spent in frantic searches for online recipes to get a general idea of what the hell goes into peanut sauce. Since the first order of business for this sauce was inexpensive, I was forced to immediately discard almost all of the websites I glanced at. (So much coconut milk!) In the end, I pretty much had to completely invent a recipe from scratch based on the two or three times in my life I have ever had peanut sauce. On the plus side, it gave me an excuse to go to a delightful little Thai hole-in-the-wall in the Village.
Ultimately, I tried to use only things that I had in my pantry. The full ingredient list ended up reading as follows:
As it turned out, I had to buy the first three ingredients on that list, but, thanks to Shop Rite, I only spent about $8 on the whole lot and now have enough ginger and cumin to last me a good while.
To make the sauce, I created a double boiler set-up with two pots. (For those to whom that meant nothing: If you nest your ingredients pot inside a pot of just simmering water, you can heat the ingredients more evenly and keep the peanut butter from burning. This is also useful whenever a recipe calls for melted chocolate, which burns like a California wildlife preserve.)
Melt two hefty scoops of peanut butter in the upper pot and add just enough oil so that it could be considered whisk-able and then about two to three shots of vinegar (it was the only measure I had handy...). Then, tasting after each addition, drop in some cumin, garlic, ginger, pepper, salt and the slightest bit of cinnamon. How much of each you add will depend strongly on your personal preference and, honestly, I tweaked the amounts so much during the adding of them, that I have no idea how much of each I ended up putting in.
When it is seasoned to your satisfaction, pour immediately into a bowl and serve hot. I sauteed some chicken breasts and shrimp and set out some pita and humus.
So...if you are reading this from reddit, or even not from reddit, shoot me an email, pm, text, comment, reply or smoke signal about what you want me to cook next!
What about a (cheap) peanut sauce? My favorite thing to order at the local Thai restaurant is a vegetable curry with peanut sauce, but I don't get to eat it as often as I'd like since it's expensiveWell, nicksterluv, your wish is my command.
Unfortunately, I had never before cooked anything even remotely Thai, so my next few days were spent in frantic searches for online recipes to get a general idea of what the hell goes into peanut sauce. Since the first order of business for this sauce was inexpensive, I was forced to immediately discard almost all of the websites I glanced at. (So much coconut milk!) In the end, I pretty much had to completely invent a recipe from scratch based on the two or three times in my life I have ever had peanut sauce. On the plus side, it gave me an excuse to go to a delightful little Thai hole-in-the-wall in the Village.
Ultimately, I tried to use only things that I had in my pantry. The full ingredient list ended up reading as follows:
- peanut butter
- ginger powder
- cumin
- garlic powder
- cinnamon
- salt
- pepper
- olive oil
- white wine vinegar
As it turned out, I had to buy the first three ingredients on that list, but, thanks to Shop Rite, I only spent about $8 on the whole lot and now have enough ginger and cumin to last me a good while.
To make the sauce, I created a double boiler set-up with two pots. (For those to whom that meant nothing: If you nest your ingredients pot inside a pot of just simmering water, you can heat the ingredients more evenly and keep the peanut butter from burning. This is also useful whenever a recipe calls for melted chocolate, which burns like a California wildlife preserve.)
Melt two hefty scoops of peanut butter in the upper pot and add just enough oil so that it could be considered whisk-able and then about two to three shots of vinegar (it was the only measure I had handy...). Then, tasting after each addition, drop in some cumin, garlic, ginger, pepper, salt and the slightest bit of cinnamon. How much of each you add will depend strongly on your personal preference and, honestly, I tweaked the amounts so much during the adding of them, that I have no idea how much of each I ended up putting in.
When it is seasoned to your satisfaction, pour immediately into a bowl and serve hot. I sauteed some chicken breasts and shrimp and set out some pita and humus.
So...if you are reading this from reddit, or even not from reddit, shoot me an email, pm, text, comment, reply or smoke signal about what you want me to cook next!
Thursday, September 15, 2011
Spaghetti with Mussels Arrabiata
My find of the day the other day was that the Kings near me sells a pound of mussels for three dollars. Naturally I had to make something fantastic with them.

The biggest challenge with mussels is that you need to clean them. If you don't, you will get sand and barnacles and fish poop in your sauce. First you must sort them into living and dead. Any of them that are at all opened are dead and will begin to rot. You should throw them out. If any of them open in the cleaning, toss them too.
Place all of the remaining (live) mussels in a pot of cold water and grab a (disposable) toothbrush and scrub each of the mussels . I usually put them into a nearby bowl as I work. Throw out the water and repeat two more times. You probably won't get much the third time but that's how my Great-aunt Mildred always did it, so that's how I do it too.
 |
| Not visible: the pile of sand at the bottom of that pot. |
Combine in a pot one small can of tomato paste, two small cans of chunked tomatoes, one small (tomato paste sized) can of water, a small. diced onion, salt, pepper, garlic, red pepper and a couple splashes of tobasco sauce (I would have used sriracha, but I couldn't find any at my supermarket), and bring it to a boil for twenty minutes, then lower it to a simmer.
 |
| Warning, this is spicy |
Once the sauce is simmering put on a pot of water to boil. When the water is boiling, put the mussels in the sauce and the spaghetti in the water. The mussels are done when they are all opened (if one refuses to open three minutes after his brothers, just toss him) and the pasta is done when it sticks to the ceiling. (Don't test that last one.) Lay the mussels and sauce over the pasta
|
| Savory and spicy |
Italian Sausage with Peppers and Onions
This past weekend was Hoboken's Feast of the Madonna Dei Martiri, the biggest Italian Festival in a very Italian-American town. This three day party is full of cannoli (including the one from Carlos' Bakery of Cake Boss fame, which I diligently avoided), zeppole and fried oreos, pizzas, ices and, my personal favorite, sausage and peppers.
 |
| How could you not love this? |
Every time a festival comes to town, I cannot resist buying zeppole, and Will needs to get his fried Oreo fix, but we never buy sausage and peppers, because, frankly, I make them better. Here's how:
Take a package of five sweet Italian sausages and put them in a hot, dry pan.
 |
| Sausages even look good raw. |
 |
| As a non-vampire, I can never have too much garlic. |
Take a small sub roll (or a hoagie roll if you are a heathen) and cut it open and in half and rip out the delicious doughy insides. If you can resist eating that now, you can dry it for some great bread crumbs. Place the mixture into the roll and eat it now or wrap in tinfoil and take it to go, Italian style.
|
| I'm salivating with the memory |
Thursday, September 8, 2011
Back to Basics Beef Sauce
Hey all! Long time no see! Before the complaints begin rolling in, I am aware that I have completely failed in my daily posting. Sadly the summer is over, which means I no longer have vast swaths of free time to shop, cook, take pictures and blog every single day. So, I will do my best to post something new and exciting once a week for your culinary pleasure.
Anyway, updates! Since my last post, I finished my thirty meals in thirty days. If you want the recipes for my stab a chili, toppings-in burgers, hearty veggie sandwiches, pizza rolls, chicken cacciatorre or cold orzo salad, please let me know and I would be happy to oblige.
In other news, I finally made the hajj to Mario Batali's Eatily. Let me just say, I am very lucky that I went with my boyfriend because I would have spent all of my money on gourmet cheese and pasta. As it was, I managed to pick up the most beautiful cremini mushrooms and the best looking onion I have been able to find in weeks. (One of the most heart wrenching trade-offs about the end of summer is that I lose my tomatoes but gain squashes and zucchini.)
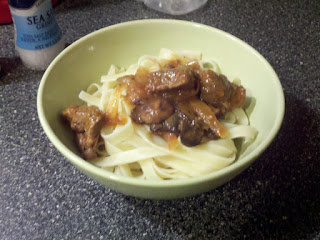
With these gorgeous vegetables, I planned out a beef sauce.
I supplemented my findings with two pounds of chuck meat, a small jar of tomato puree and some fettuccine from Shop Rite.
I decided that I was going to make this sauce while actually using the proper cooking methods for each individual step. Which, in this particular case, means lots and lots of butter.
I hate the idea of using butter in cooking, but you can't argue with the results. While a touch more finicky than oil, (it has a tendency to burn) the lower boiling point of butter means that foods cook more evenly.
I caramelized the onions and browned the mushrooms at the same time in two different pans.
To caramelize onions: This is a time consuming process but simple enough to do. In a pot, melt about three tablespoons of butter (on medium heat, it will burn!). Mix in salt, pepper, a crushed clove of garlic and a touch of basil. Pour into the pot a largish onion sliced in quarters and then across the grain so that you have strips of onion about 10 cm in length by 1 cm width. Keep it on medium or low heat, stirring occasionally. You want them to turn clear, and then wilt, and then turn a light brown.
To brown mushrooms: Slice the onions into 1 mm pieces and place in one sparse layer in a dry pan. Turn on the pan to medium low heat and let the mushrooms "sweat" out their moisture. Stir occasionally but try to keep them in one layer. A common mistake when preparing mushrooms in this style is to "crowd" the mushrooms in the pan. The trick is to give them plenty of room between each mushroom, due to the minuscule size of my pan, I ended up doing them in three batches. After the final batch was completed, I put all of them back in the pan with a small pat of butter on high heat to sear in the flavor. When they are finished, throw them in the pan with the onions.
When you are finished, your onion pot should look something like this:
Anyway, updates! Since my last post, I finished my thirty meals in thirty days. If you want the recipes for my stab a chili, toppings-in burgers, hearty veggie sandwiches, pizza rolls, chicken cacciatorre or cold orzo salad, please let me know and I would be happy to oblige.
In other news, I finally made the hajj to Mario Batali's Eatily. Let me just say, I am very lucky that I went with my boyfriend because I would have spent all of my money on gourmet cheese and pasta. As it was, I managed to pick up the most beautiful cremini mushrooms and the best looking onion I have been able to find in weeks. (One of the most heart wrenching trade-offs about the end of summer is that I lose my tomatoes but gain squashes and zucchini.)
With these gorgeous vegetables, I planned out a beef sauce.
|
| Warning: This may be the best thing I have ever made |
I decided that I was going to make this sauce while actually using the proper cooking methods for each individual step. Which, in this particular case, means lots and lots of butter.
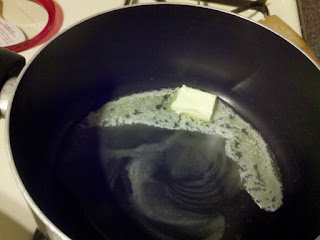 |
| Like, seriously, a lot. |
I caramelized the onions and browned the mushrooms at the same time in two different pans.
To caramelize onions: This is a time consuming process but simple enough to do. In a pot, melt about three tablespoons of butter (on medium heat, it will burn!). Mix in salt, pepper, a crushed clove of garlic and a touch of basil. Pour into the pot a largish onion sliced in quarters and then across the grain so that you have strips of onion about 10 cm in length by 1 cm width. Keep it on medium or low heat, stirring occasionally. You want them to turn clear, and then wilt, and then turn a light brown.
To brown mushrooms: Slice the onions into 1 mm pieces and place in one sparse layer in a dry pan. Turn on the pan to medium low heat and let the mushrooms "sweat" out their moisture. Stir occasionally but try to keep them in one layer. A common mistake when preparing mushrooms in this style is to "crowd" the mushrooms in the pan. The trick is to give them plenty of room between each mushroom, due to the minuscule size of my pan, I ended up doing them in three batches. After the final batch was completed, I put all of them back in the pan with a small pat of butter on high heat to sear in the flavor. When they are finished, throw them in the pan with the onions.
When you are finished, your onion pot should look something like this:
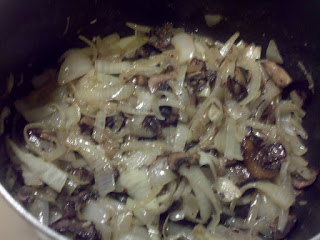 |
| I'll give you a second to roll your tongue back into your mouth |
Let that keep cooking on medium while the mushroom pan (with all of the lovely mushroom juice) is busy cooking a slab of chuck meat, cut into 3 cm cubes. I specifically used chuck meat because a) it is cheap and b) the high fat content lends an increased flavor to the overall sauce. But mostly because it's cheap. Cook it on high heat to sear the meat and brown it quickly. Toss the beef into the ever softening onion/mushroom mix and add in your can of tomato puree and one can's worth of water.
 |
| Suddenly, sauce! |
Bring that to a boil and let it reduce while you put a pot on for the pasta. Season well with more salt, pepper, basil and some parsley. By the time the pasta is finished cooking, your sauce should have thickened nicely. Place a healthy dollop of your concoction over your pasta and enjoy!
Monday, August 15, 2011
Pasta Carbonara
I like to think of pasta carbonara as a kind of macaroni omelet. Yes it is as delicious as it sounds.
 |
| It's pasta AND eggs? |
This recipe has been a family favorite for years. My mother has perfected it to an art. However this was my first experience making it.
To make it you will need some pig product (ham, prosciutto, speck, taylor, etc.), eggs, grated cheese and cooked spaghetti. Make sure that you cook the pasta in advance because the recipe really cannot progress past step one if you are waiting on the pasta.
The trick to this meal is how fast it has to be cooked. So you need to have everything ready when you start.
Begin by taking some eggs (half a dozen is enough for a pound of pasta, or, as I learned, four is not quite enough) and separating them.
 |
| Three balls of sunshine and one massive disappointment |
Fry them. Fry them all!
 |
| Mwahahahaha! |
The next few steps must happen in quick succession and require both hands so I have no pictures for them.
Sorry.
In rapid succession, while stirring and in this order add:
- Pasta
- Oil
- Salt, Pepper, Garlic Powder
- Egg Whites
- Cheese
Let that cook while stirring constantly. Once the egg whites are fully cooked, add the yolks and mix in thoroughly. Once they are cooked, take the pan off the burner immediately.
 |
| Whew! |
|
| Well worth the effort. |
Sunday, August 14, 2011
Midnight Snack
Between getting home and going out, I had almost no time to cook today. So I took the moment when the rest of the house was silent and made myself a quick midnight snack: Bananas and Peanut Butter.
You will need a banana and some peanut butter
Cut up the banana and place it on a plate with a sizable dollop of peanut butter. Eat with fingers (and a handy napkin).
You will need a banana and some peanut butter
 |
| Apparently I am incapable of spelling banana right the first time |
 |
| This one required meticulous planning |
Gnocchi in a Red Wine Reduction
Tonight we will be making a red wine reduction with onions and mushrooms.
I decided to try to make gnocchi as well, with limited success. You can find a better recipe than I could give you here.
But for this post, I want to focus on the sauce I made to go along with the my gnocchi of dubious consistency. To make this, you will need mushrooms, onions and a largish glass of red wine. Begin by sweating the mushrooms, by sauteing them in a dry sauce pot until they begin to produce liquid. It will honestly look like they are sweating. Its kinda cool to watch. The reason for doing this is that it facilitates the dispersal of the mushroom flavors into the rest of the dish.
Once the mushrooms are good and brown, add in a finely diced onion and mix it in. Now let it sit.
No seriously, don't mess with it. Just add some healthy seasoning (salt, pepper, garlic and basil)
Now add your glass of wine and bring it to a boil. Let it simmer until it is reduced to almost a paste.
Mix in your gnocchi and serve

 |
| Better than it looks |
 |
| Mine ended up slightly less...coherent that I had hoped. |
 |
| You can see the sweat much better in person |
No seriously, don't mess with it. Just add some healthy seasoning (salt, pepper, garlic and basil)
 |
| So hard to resist stirring! |
 |
| The wine is, of course, only ever used for cooking. |
Tuna Melt Dip
This is a dip variation of the classic tuna melt sandwich

In order to make this delectable mixture, you will need two cans of oil based tuna, some tomato and Swiss cheese.

Drain the tuna and place it int a frying pan with some garlic to saute it a little bit
Chop up your tomatoes
Throw them in the pan along with the tuna and layer the Swiss on top. Turn off the heat and just let it sit until the cheese is fully melted and then dip away!

In order to make this delectable mixture, you will need two cans of oil based tuna, some tomato and Swiss cheese.

Drain the tuna and place it int a frying pan with some garlic to saute it a little bit
 |
| There will be enough oil left in the cans to cook the fish. |
 |
| Nothing better than fresh Jersey Tomatoes in the summer |
Subscribe to:
Posts (Atom)